
The label editor software included with the Adam Equipment AE 503 and AE 504 indicators allows users to take full advantage of the indicators’ built-in printers. The following guide presents an overview of the software’s capabilities and how to print labels using our AE weighing scale indicators.
Quick access toolbar

New label: click the icon of the dog-eared paper to create a blank label.
Open existing label: opens and existing label design.
Save: allows the user to save the current label design.
Customize the quick access toolbar: allows the user to add more options to the quick access toolbar (the default setting is icons for new label, open existing label and save).
Attribute toolbar
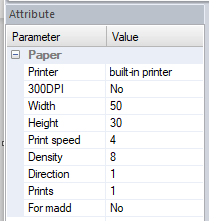
The 'Attribute' window allows the user to adjust values for selected elements on the label. When no element on the label is selected, the user can adjust 'Printer' values.
Clipboard tool
Copy: copy the selected element on the label.
Paste: paste a copied element on the label.
Select all: selects all elements on the label to manipulate together, such as copying-and-pasting, deleting or alignment.
Delete: deletes the selected element on the label. Elements can also be deleted by right-clicking on them and selecting 'Delete' from the pop-up menu.
Insert toolbar

After placing them on the label, the items under the Insert Toolbar can be moved along the X axis (horizontal) and Y axis (vertical) in the Attribute box under Parameters, in addition to selecting them with the mouse and dragging them.
Text: allows user to enter data into pre-defined text fields, such as weights, dates, time, quantities, price, etc., by selecting the down arrow next to the word Text.

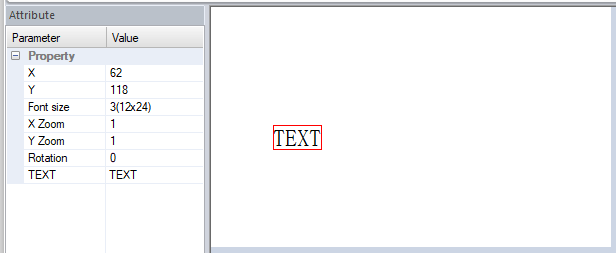
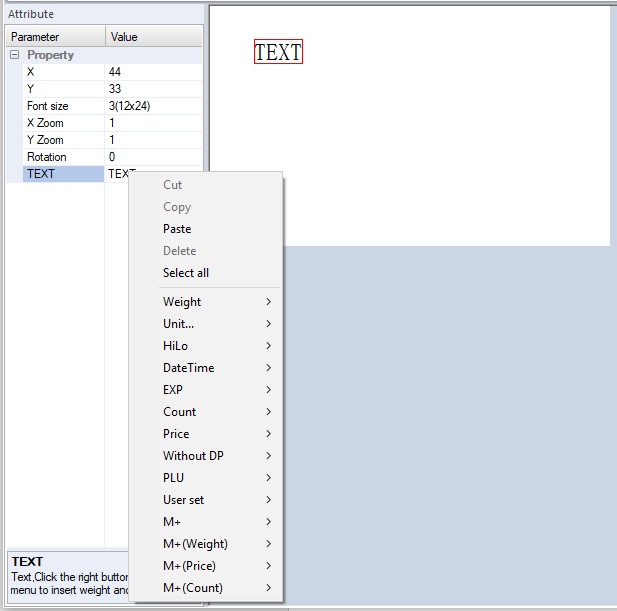
In the Attribute window, highlight the value Text and right click on the Text value for a pop-up menu that allows the user to define the contents of the text field. To adjust other Parameters in the Attribute window, select the Values to change location of the text box, font size, zoom along the X or Y axis (which stretches the text to make it taller or wider) or rotation (in 90-degree increments). This font cannot be changed.
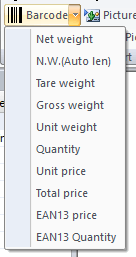
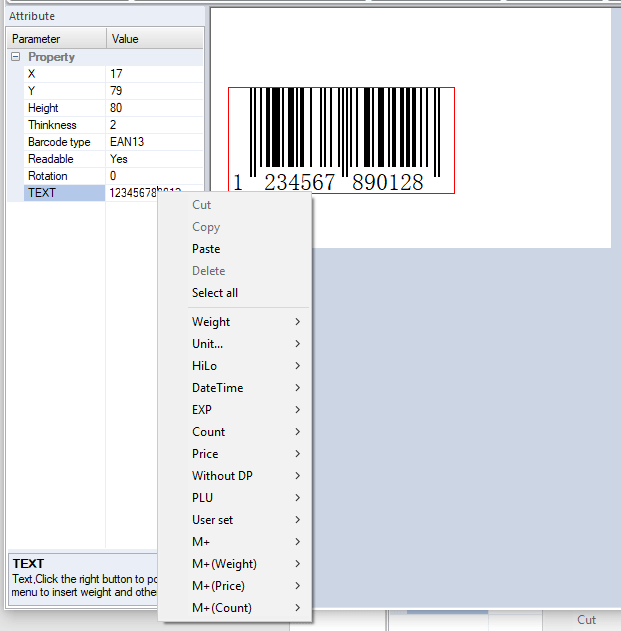
Barcode: allows user to create a bar code that will encode pre-determined information, such as weights, quantities or price. The Attributes window also allows the user to move the barcode, adjust the height or thickness, make the barcode readable or rotate it.
In the Attribute window, highlight the value Text and right click on the Text value for a pop-up menu that allows the user to define the contents of the bar code.
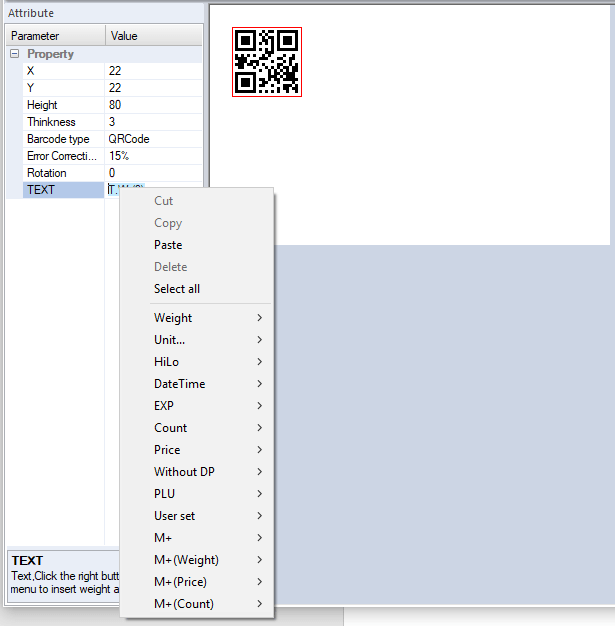
QR code:inserts a QR code. Right click on the Text value for a pop-up menu that allows the user to define the contents of the QR code. The Attributes window also allows the user to move the QR code, adjust the height or thickness, rotate the code, change the QR code to different types of barcodes or define the level of error correction.
Bar: inserts a line that can be modified (width or height) or moved using the Attribute window.
Picture: inserts a placeholder icon for an image or logo. The actual image is then selected using the File parameter in the Attribute window. The image type must be a Bitmap (.bmp). The picture can be moved by the X and Y values within the Attribute window or dragged with the mouse.
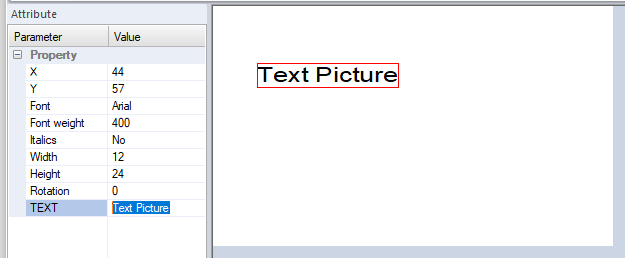
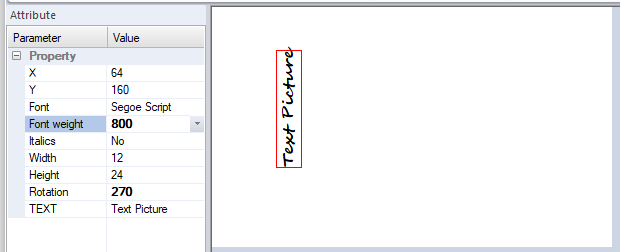
Text picture: allows user to enter any desired text without predefined values and change the font. Click Text Picture, then click in the label to place it. In the Attribute window, highlight the value Text Picture and type the desired text. Selecting the values allows the user to move the box, change the font, adjust the font weight, italicize the text, stretch the text to make it wider or taller, or rotate the text in 90-degree increments.
Box: inserts a box that can be modified (width, height or thickness) using the Attribute window.
Eraser: creates a white box that can be modified (width or height). Anything located behind the box remains hidden.
Reverse: creates a black box that can be modified (width or height). Used in tandem with one of the Text functions, text located behind the box will be reversed (i.e., white text against a black background).
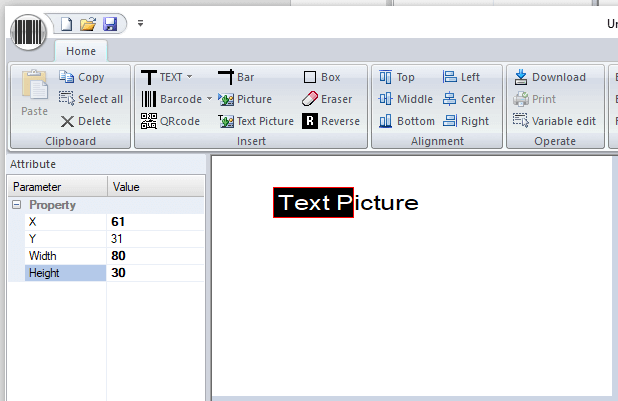
alignment toolbar

Alignment modifies how different elements relate to each other. For example, if a QR code and product name are placed next to each other and both are selected, clicking Top will align the product name along the top of the QR code, while Middle will center it and Bottom will align it with the bottom edge of the QR code.
 |
 |
 |
Operate toolbar

Download: Users can select the communications port or baud rate to connect the indicator and PC.
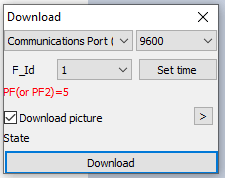
Print: allows user to print the label.
Variable edit: allows the user to access and modify several default values.
For example, if the user will only have occasional use for a SKU name on the label but would prefer to have a dedicated space for it for those times, they can use default generic placeholder text (such as a company name) that will always be used unless an actual SKU name is entered.
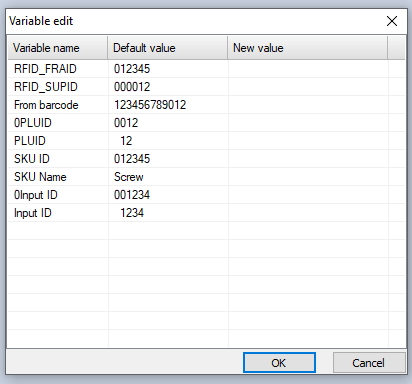
Language toolbar
Labels can be created in English, Spanish, French, Italian or German. Please note that the language should be selected first because changing language in the middle of label creation will clear unsaved data.
Mode toolbar
Users can select between Template (which inserts standardized information the user can modify) or Normal (which starts with a blank label).
Custom label templates can be purchased through Adam Equipment, call your local office or use our online contact form.

